HOW TO MEASURE FOR A NEW GARAGE DOOR INSTALL OR GARAGE DOOR REPLACEMENT
HOW TO MEASURE A GARAGE DOOR
HOW-TO-MEASURE FOR YOUR NEW RESIDENTIAL GARAGE DOOR
ALL PRICING BASED ON STANDARD INSTALLATION CONDITIONS. ADDITIONAL
COST FOR MATERIALS ANDLABOR WILL APPLY TO THE FOLLOWING CONDITIONS:
STANDARD 2X6 “H” FRAMING MUST BE INSTALLED PRIOR TO INSTALLATION DAY REGARDLESS OF BUILDING TYPE STEEL, WOOD, OR CONCRETE. “H” FRAMING REQUIRED FOR TRACK JAMB BRACKETS, CENTER PLATES, OPENER MOUNTING BRACKET, AND BACK HANGS. (1 x 6 Material can be used but is not recommended )
STEEL FRAME BUILDINGS THAT CAN NOT BE WRAPPED WITH STANDARD “H” FRAMING WILLREQUIRE ADDITIONAL LABOR AND MATERIALS COST FOR INSTALLATION.
CONCRETE STRUCTURES THAT CAN NOT BE WRAPPED WITH STANDARD “H” FRAMING “H” FRAMING
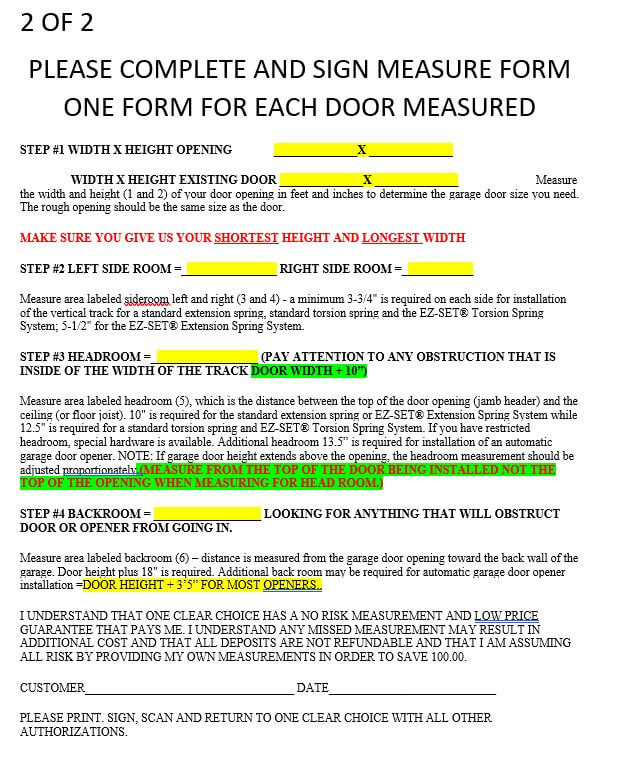
STEP #1
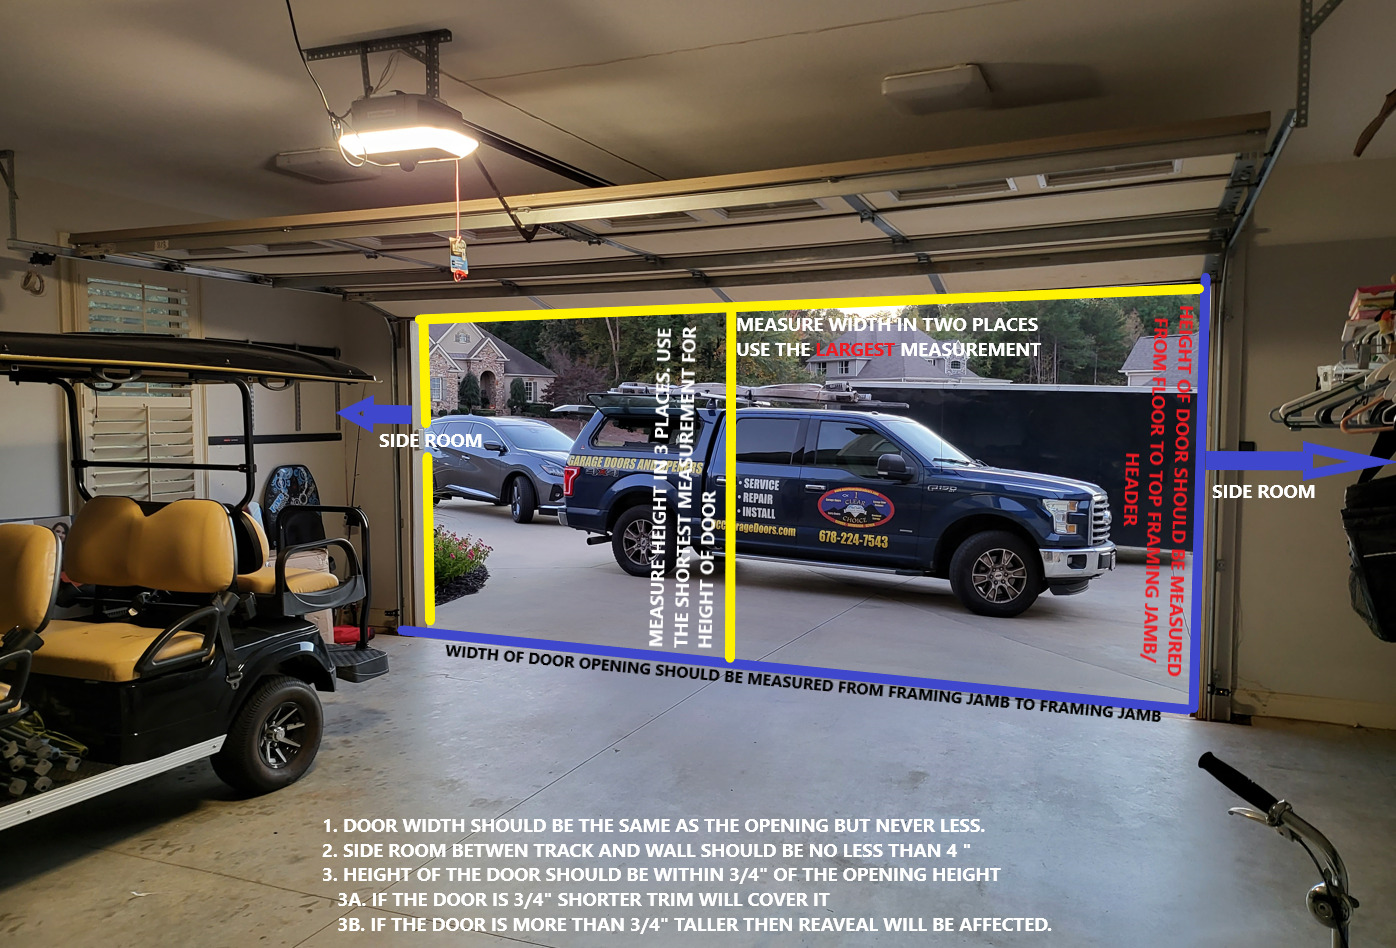
Measure the width and height (1 and 2) of your door opening in feet and inches to determine the garage door size you need. The rough opening should be the same size as the door.
STEP #2
Measure area labeled side room left and right (3 and 4) – a minimum 3-3/4″ is required on each side for installation of the vertical track for a standard extension spring, standard torsion spring and the EZ-SET® Torsion Spring System; 5-1/2″ for the EZ-SET® Extension Spring System.
STEP #3
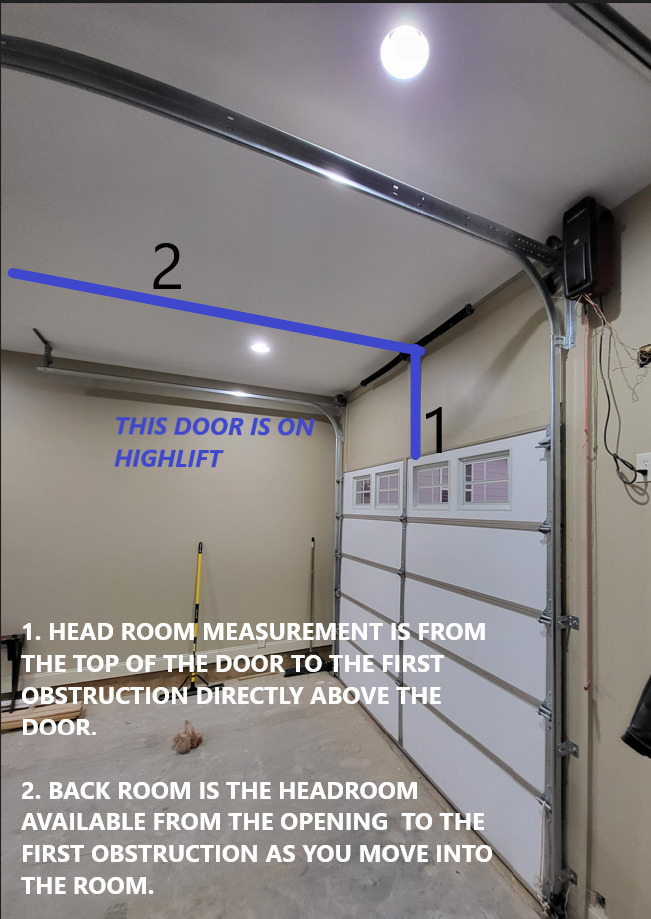
Measure area labeled headroom (5), which is the distance between the top of the door opening (jamb header) and the ceiling (or floor joist). 10″ is required for the standard extension spring or EZ-SET® Extension Spring System while 12″ is required for a standard torsion spring and EZ-SET® Torsion Spring System. If you have restricted headroom, special hardware is available. Additional headroom is required for installation of an automatic garage door opener. NOTE: If garage door height extends above the opening, the headroom measurement should be adjusted proportionately.
STEP #4
Measure area labeled backroom (6) – distance is measured from the garage door opening toward the back wall of the garage. Door height plus 18″ is required. Additional back room may be required for automatic garage door opener installation.
While it is possible to install your Clopay garage door on your own, you can get additional peace of mind by getting professional installation by a Clopay Dealer. Clopay also offers a 1-year installation warranty on replacement garage doors installed by a Master Authorized or Authorized Clopay Dealer
GARAGE DOOR INSTALLATION ROOM REQUIREMENTS
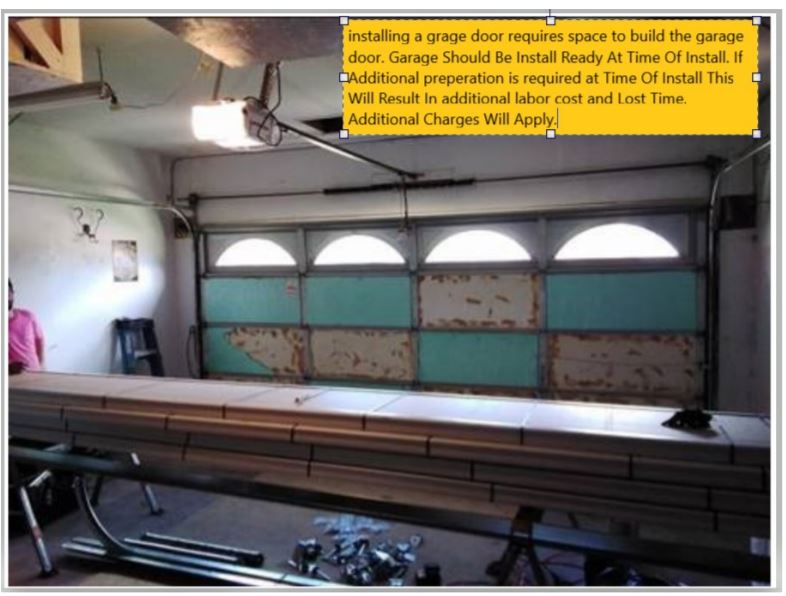
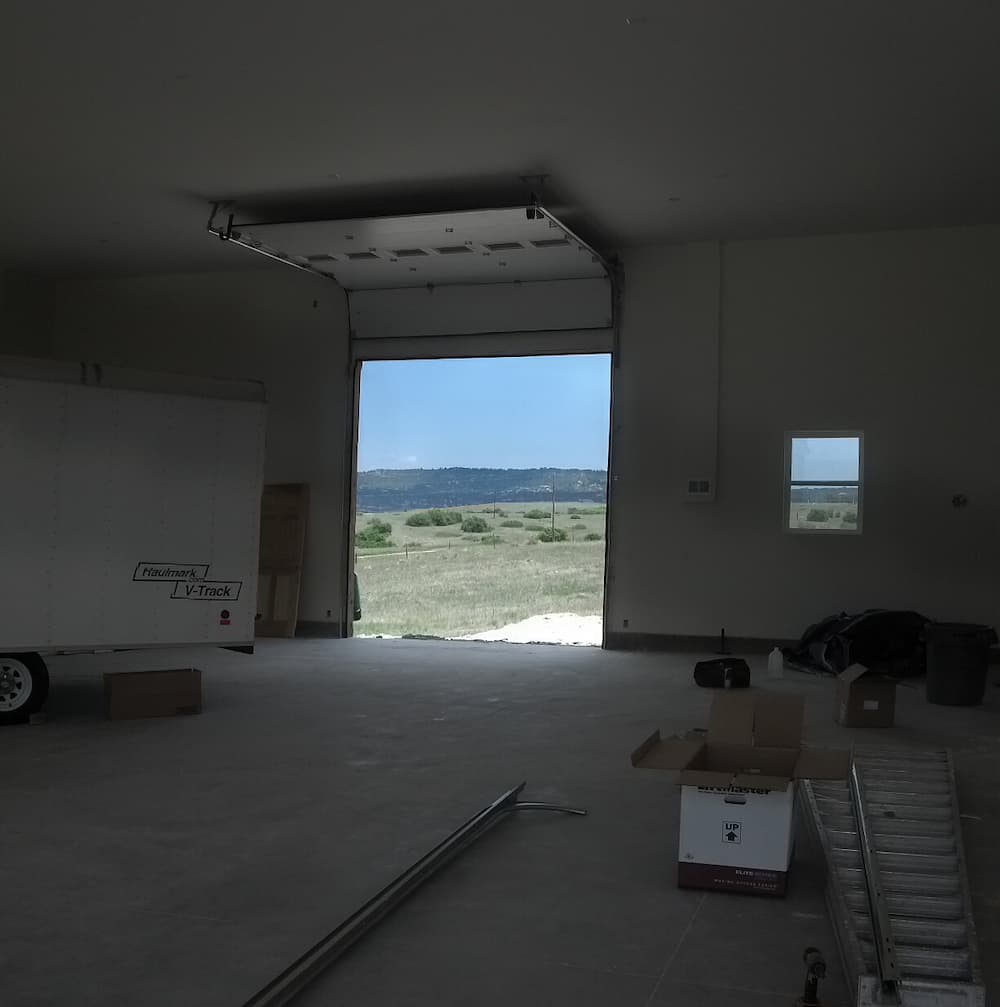
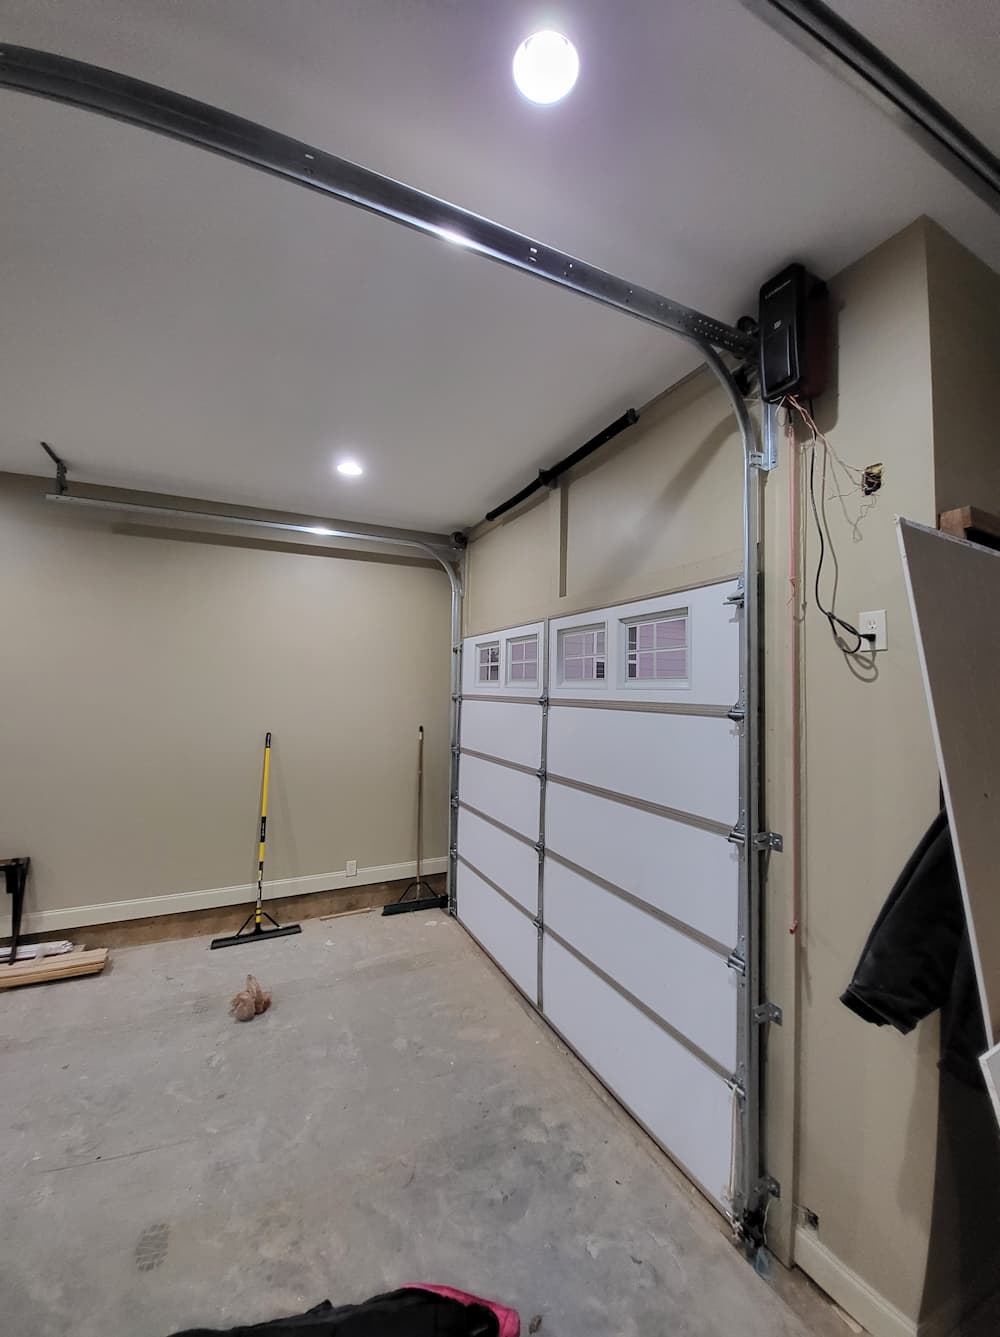
GARAGE DOORS ARE ASSEMBLED INSIDE THE GARAGE.
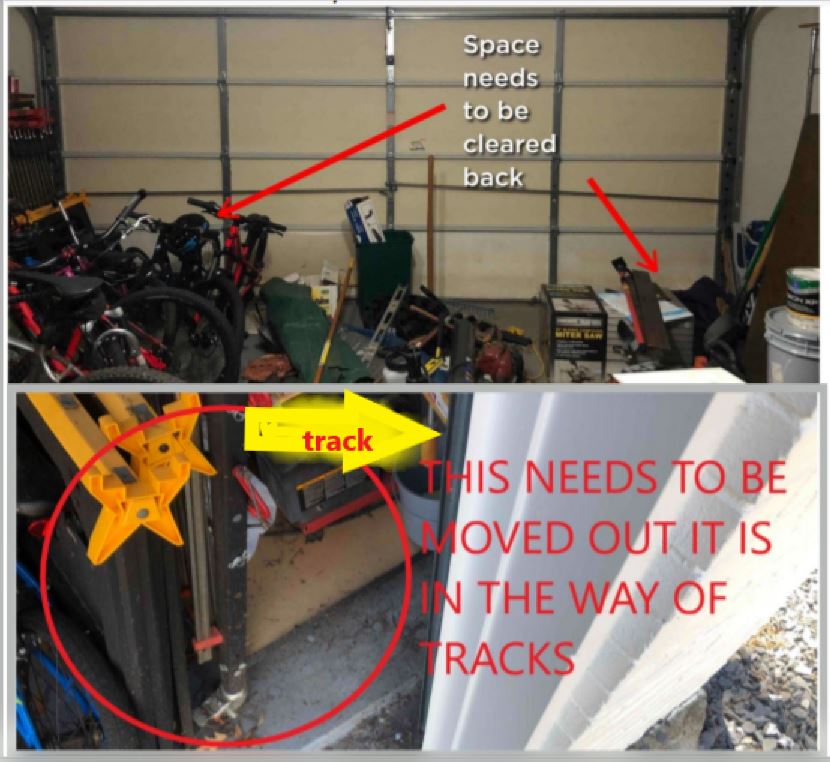
The Garage Door Is Assembled Inside Of The Garage And The Area Must Be Clear In Order To Have Room To Install The Door.
Your Garage MUST be Cleared to The Back Of The Garage Behind The Opener We Will Need Access To All Of The Following:
Track Jamb Brackets
Track Back Hangs
Room To Fit Entire Door In The Garage 17’ With Room To Move Around
Opener Back Hangs
Here Are Some Examples Of Garages That Are Not Ready For Install.
Garages That Are Not Ready For installation On Scheduled Day Will be Charged 200.00 Per Scheduled Technician To Make Up For Some of The Cost Associated With Lost Opportunity and Labor Cost. The Installation May Be Rescheduled.
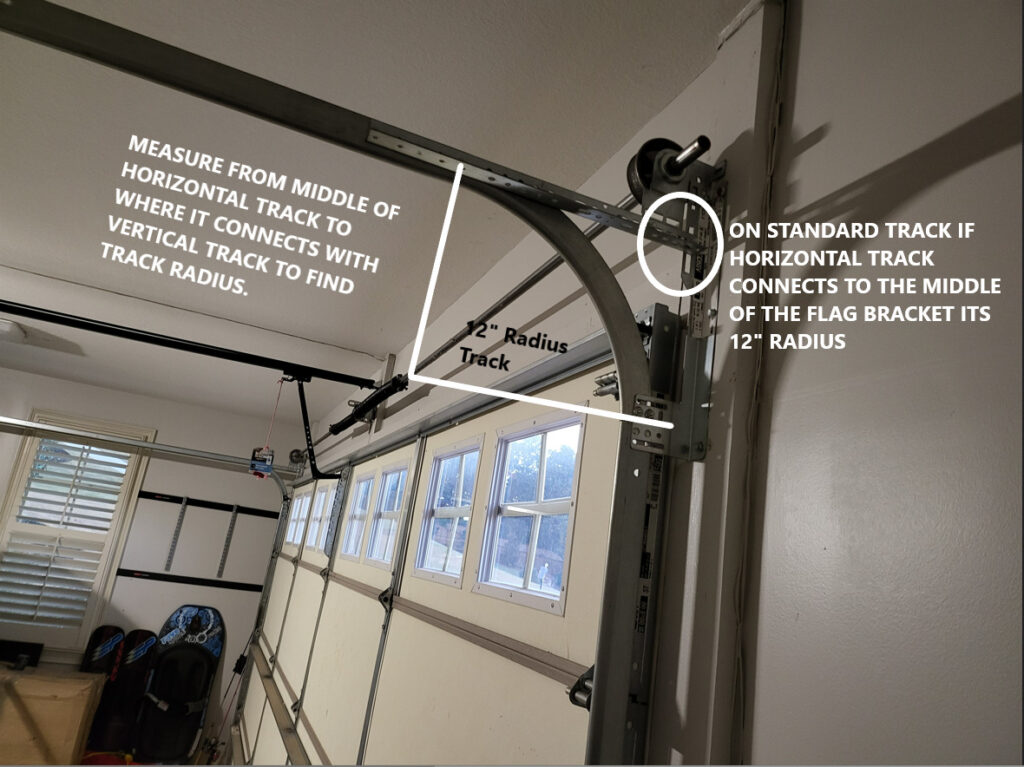
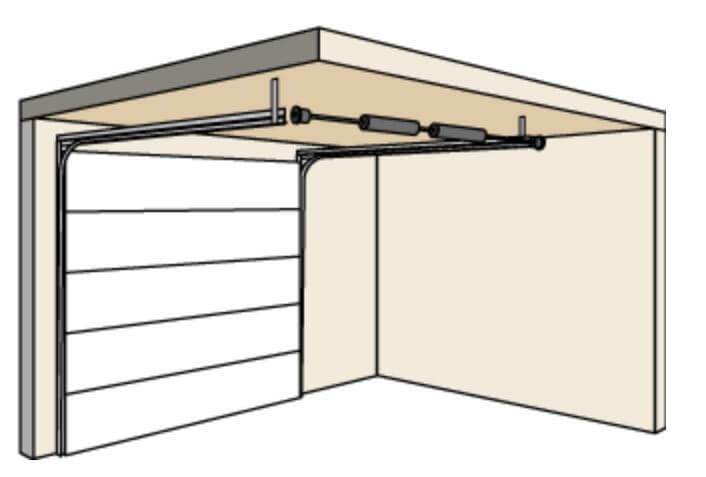
STANDARD TRACK
STANDARD TRACK
Most common garage door track. Used for typical applications.
Used when headroom is limited for proper door operation. LOW HEADROOM FRONT MOUNT SPRING SYSTEM
2″ Track Headroom = 10″ Required Side room = 4.5″ Required Backroom = Door Height + 23″ Required
3″ Track Headroom = 14″ Required Side room = 6½” Required Backroom = Door Height + 25″ Required
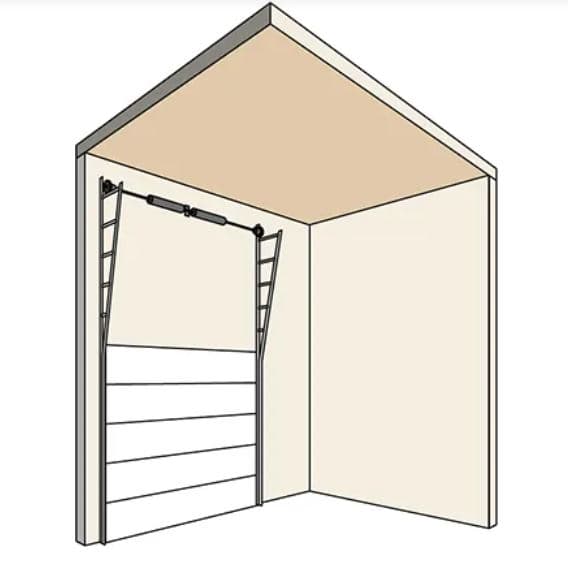
LOW HEADROOM, REAR MOUNT SPRING
Used when headroom is extremely limited for proper door operation. Requires a minimum of 4.5” of headroom. RECOMMEND A PROFESSIONAL MEASURE: 25.00 DEPOSIT THAT CAN GO TOWARD INSTALLATION REQUIRED.
2″ Track Headroom = 4.5″ Required Side room = 7.5″ Required Backroom = Door Height + 30″ Required
3″ Track Headroom = 8.5″ Required Side room = 9″ Required Backroom = Door Height + 32″ Required
lowheadroom install
25 DEGREE TRACK
RECOMMEND A PROFESSIONAL MEASURE: 25.00 DEPOSIT THAT CAN GO TOWARD INSTALLATION REQUIRED.
Used to avoid handle or window interference with opening.
2″ Track: Headroom = High lift + 9.5″ Side room = 4.5″
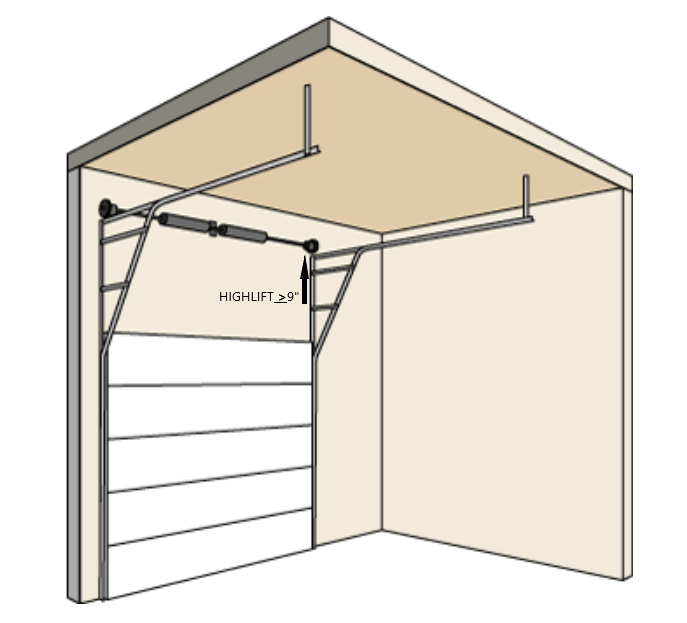
HIGH LIFT
RECOMMEND A PROFESSIONAL MEASURE: 25.00 DEPOSIT THAT CAN GO TOWARD INSTALLATION REQUIRED.
Used when there is ample headroom (over 30”) and additional workspace clearance is required. Often used to help track avoid obstacles in the garage such as an entry/pass door or other structural elements.
Dimensions listed cover the most common applications, up to 8’ high doors, and using standard torsion springs with track vertical resting on the floor. Some door or spring configurations will need additional headroom due to different components required to counter balance the door.
Calculating Maximum High-lift
Finding the correct amount of high-lift track to install is fairly easy to calculate. Since the spring line on a high lift assembly uses about 12 inches of space we need to subtract that amount from our high-lift garage door track calculation. High lift applications use special drums that are much larger than standard lift drums in most instances. If you don’t give the drums enough space they will scrap against the ceiling during operation. The formula for calculating the maximum amount of high lift you can use is (Floor to Ceiling Height) – (DOOR Height) – (12 inches) = (Maximum High Lift)
Measure from the floor to the nearest obstruction on the ceiling (ex. 144 inches)
Measure the rough opening height of your door (ex. 96 inches)
Subtract 12 inches from that figure to account for the spring line (144-96-12=36 inches)
The most high lift you can use in the example above is 36 inches or 3 feet of high lift.
NOTE: YOU MUST KNOW THE WEIGHT OF THE DOOR OR WEIGH THE DOOR IN ORDER TO GET THE CORRECT SPRING AND DRUM SIZE. ADDITIONALLY OVERHEAD RAIL OPENERS SHOULD NOT BE USED SIDE MOUNTED “JACK SHAFT” GARAGE DOOR OPENERS SHOULD BE USED. The Distance From The Top Of The Track To The Ceiling Can Vary Due To Drum Size Requirements.
This is A Project For A Professional Do it yourself Conversion Kits Available Starting At 399.00 Plus Shipping. Free Delivery Is Available In Selected Areas In